
Cell Phone Mania
Let’s face it, the BEST camera is whatever camera you have with you. For most everyone, that is usually a cell phone. Yes, cell phone cameras are the bane of most professional photographers existence. But my passion for preserving memories is larger than any disdane for Uncle Bob stealing my shots over my shoulder. This week I’m highlighting some ways that you can maximize your cell phone camera and get the best shots possible with that tool.
Lean on Me
You’ll get crisp, clean shots that are in focus if you stabilize your cell phone before you snap that pic. As photographers when we don’t have a tripod you’ll sometimes see us squeezing our elbows into our chest and really compressing the middle part of our bodies. This gives us the most solid base possible without a tripod. You can do the same with a cell phone. You can also use things available around you like rocks, posts, and even people as makeshift tripods. If you watch photographers closely you may also see our breathing is regulated with when we are pushing that shutter. You can do the same thing. Take a deep breath, blow it out, pause and then take that picture.
Make it Interesting

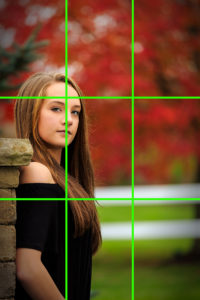
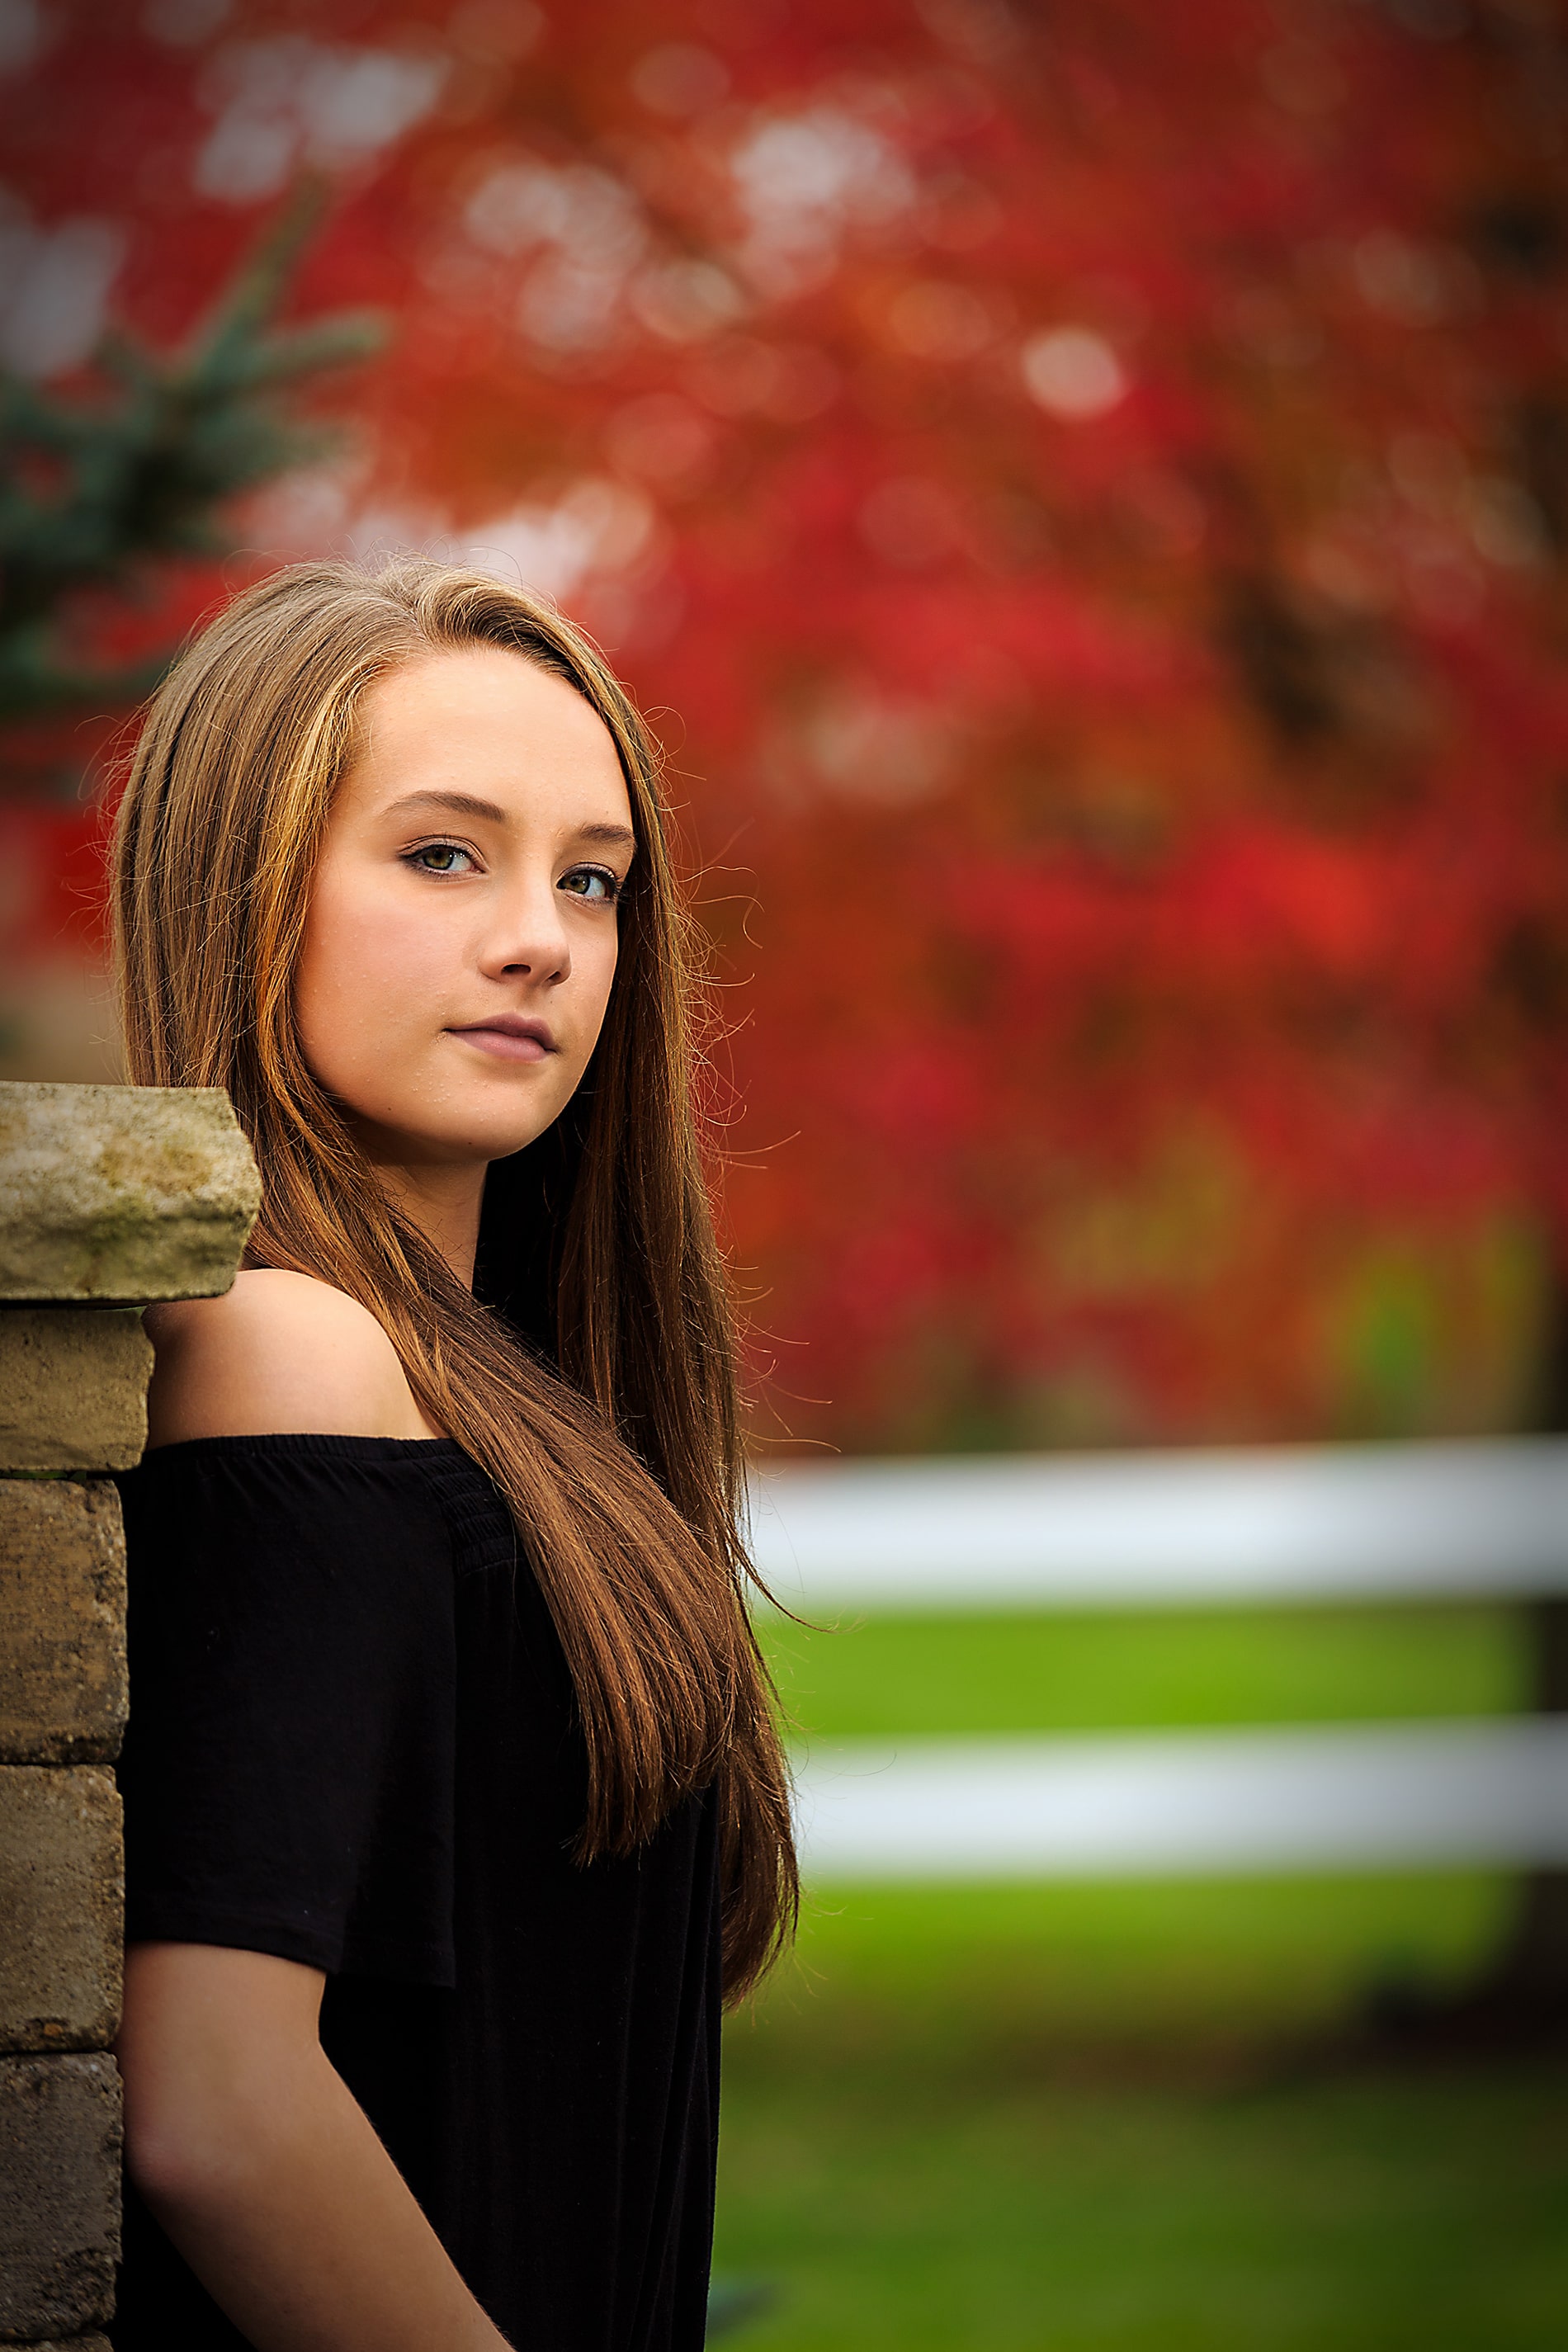
One of the basic principles of photography is the rule of thirds. In simple terms it means that if you were to draw four lines (two vertically, two horizontally) to split your picture into nine sections, you want the most important parts of the picture to be captured at the intersection points of those lines. I’ve taken one of my images and superimposed the lines to give you a visual of what we mean. This is the most basic composition rule, there are many others but start with this one and see how your images change. Give your subject some context, get creative and place things in the lower half of your image. And of course, all rules are meant to be broken so experiment with slapping this rule in the face and see what you get. The flower image here totally ignores the rule of thirds and it has great visual impact for that very reason.
HDR
Yes, your phone camera can probably do lots of things that you didn’t even know were possible, especially not on your phone. HDR stands for High Dynamic Range. In simple terms it means that we want to maximize the dynamic range between our darkest darks and our lightest lights. It’s very difficult (usually impossible) to get this range with one picture. If you expose for the darks, your lights are too dark. If you expose for the lights, the darks are too light. (Say that three times fast!) With an HDR image you take multiple exposures of the same image (usually in groups of 3, 5, 7 or 9) and then take the best exposure of the shadows, midtones, and highlights and combine them (via processing software) into one image. Most modern smart phones offer this feature. They vary in how they accomplish the task but it can be an interesting way to capture difficult lighting situations or landscapes. We do recommend a tripod.
Light
Photography literally means ‘painting with light’, so it shouldn’t be a surprise that light is a requirement. The quantity and quality of light matters, especially with cell phones. Find somewhere with sufficient natural light or add some of your own to get the best images. We did a blog post a few weeks ago about a cell phone ring light which is a great answer to this problem for cell phone portraits. But don’t take a picture from 15 feet away in a candle lit room and expect magic! Your cell phone doesn’t have the tech to handle that.
Keep it Clean
Fingerprints? Lint from your pocket? Do I really need to elaborate? Clean off your lens!
Who’s Zooming Who
Cell phones use something called digital zoom to allow you to zoom in on your subject in your viewfinder. Your cell phone basically extrapolates data to simulate what the image should look like when you zoom. You’ll notice that the sharpness and quality is very quickly degraded when you spread those fingers and zoom in on your screen. That’s because the camera is basically making it up. You’re usually better off ignoring this and just taking the picture at full resolution and then cropping in your preferred editing tool. We did our own comparison just to see. These images were taken with a Samsung Note 5. I know the crops aren’t exactly the same but I think they are close enough for you to do a fair comparison. And if you love these glitter hippos, you need to come back in a few weeks. We’ll be highlighting them again.
Edit, Don’t Filter
Instagram has ingenuously integrated filters into their sharing app and now absolutely everyone feels like they need to use them. The challenge is that the filter applies the effect universally across the image without considering how the effect should be used to improve the photo. You have absolutely no control, you just click and apply. It’s great for an easy fix and we know that you have your favorite filters that you’ll never give up. But before you slap Lark on another selfie, give it a try with an actual editing app. There are some great ones for iPhones (Snapseed, VSCO, and Enlight) and for Android (Photoshop Express, PhotoDirector, and Snapseed).
Look at the Camera
Eye contact is important for any picture. Take the time to know where your lens is on your phone and make sure everyone is making eye contact. Super simple tip, but it can make a big difference in your final photo.
Summary
You can get great results with your cell phone if you know how to maximize it’s features. We hope at least of few of these tips will help you improve your personal photography. What are some other tricks or tips that you use to capture great images with your cell phone?